Selective contrast/clarity in Photoshop CC
Posted: May 4th, 2014 | Tags: Photography • Tutorials | Posted in: Photography, TutorialsJust a quick note. This probably works in all versions of Photoshop, it just so happens that I have Photoshop CC.
This is a quick method for selectively increasing contrast in images. It looks more complicated than it is, but once you’ve done it a few times it becomes fairly simple.
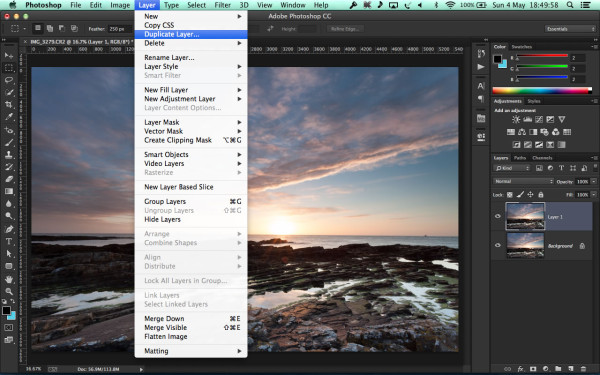
Step 1 – Duplicate the background
(Layer -> Duplicate Layer…)
This is pretty much the first thing you should do in Photoshop. Having a duplicate of the main image in a new layer means that even if you screw things up, you still have the original image to fall back on. You may have heard the term “non-destructive editing”?
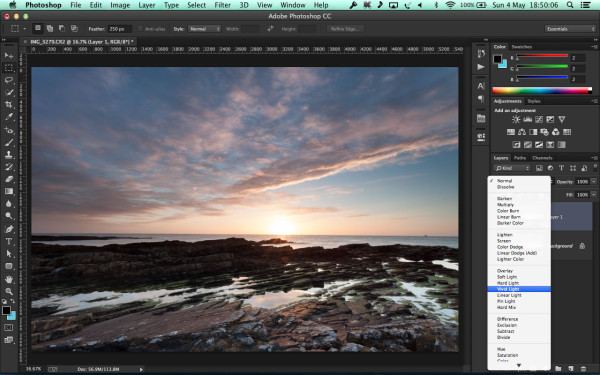
Step 2 – Change the blend mode to “Vivid Light”
This is going to look crazy, I warn you in advance, but don’t worry, it will all look fantastic in the end.
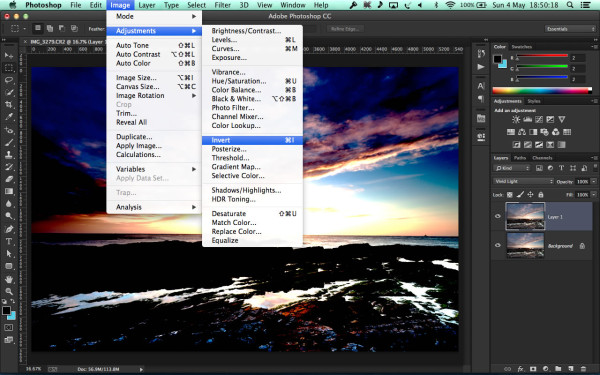
Step 3 – Invert the colours
(Image -> Adjustments -> Invert)
You can see how crazy I meant when I said crazy in the last step. What we’re going to do here is “Invert” the colours, and depending on the image you’re editing, it may look a bit more crazy after this step.
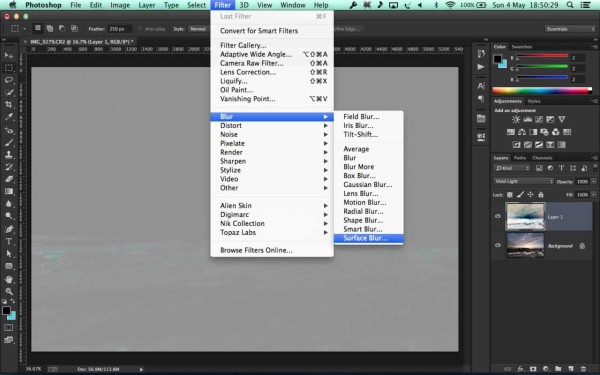
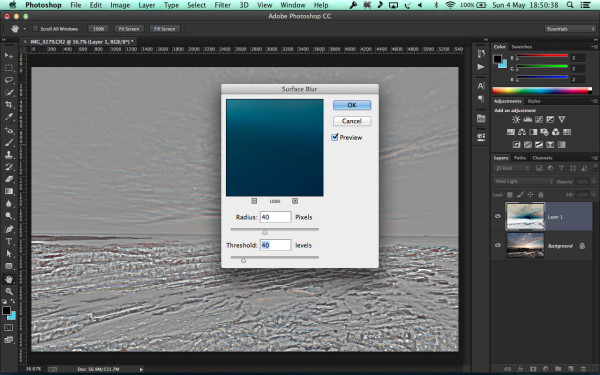
Step 4 – Apply the Surface Blur Filter
(Filter -> Blur -> Surface Blur)
The Surface Blur filter is very useful. It allows you to blur an entire image, except the edges within it.
Step 5 – Set the Radius and Threshold of the Surface Blur Filter
I just set both of these to 40. Feel free to experiment though. This filter does a lot of work and can take some time to complete.
Step 6 – Press Command-Option-Shift-E (PC: Ctrl-Alt-Shift-E) at the same time
Command-Option-Shift-E (PC: Ctrl-Alt-Shift-E) is an incredibly complex shortcut to both type and remember. What it does is create a merged copy of all the layers you have open in the document. It means you don’t need to completely flatten your image, because that means there’s no way back to the original from what you’ve done whilst editing.
Once you’ve done this you can delete the middle layer.
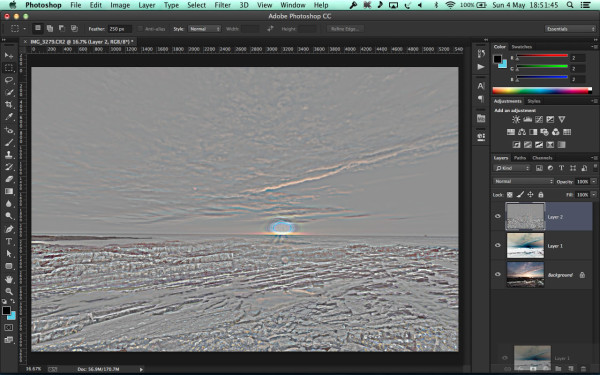
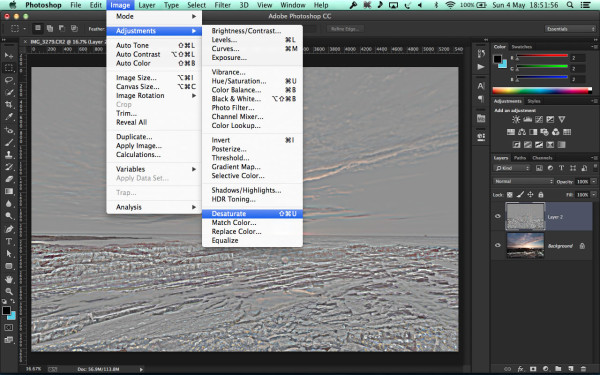
Step 7 – Desaturate the colours in the layer
(Image -> Adjustments -> Desaturate)
After using Invert earlier we are still left with some colour in the image, we don’t really want that.
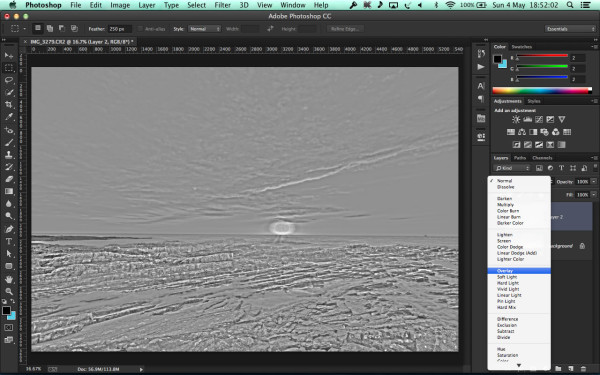
Step 8 – Change the Blend Mode to “Overlay”
I’m not going to go into what the Overlay Blend Mode does in this quick tutorial, but if you are familiar with the effects of some of the other ones I will tell you that Overlay is a combination of Multiply and Screen blend modes.
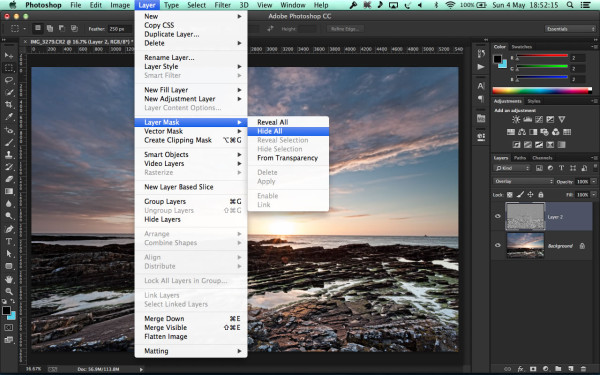
Step 9 – Create a Layer Mask
(Layer -> Layer Mask -> Hide All)
After the last step your image will probably look very “Punchy”. Some people may like that… I don’t. What I do is create a Layer Mask (Hide All) to hide the effect until I paint it back in using the brush tool with the foreground colour set to white.
Step 10 – Paint the areas where you want punch!
I paint normally in the foreground, or anything I want to have a bit of texture. This depends completely on your image, so just paint the bits you want :) If you make a mistake you just change the foreground colour of the brush to black and paint on the areas you want to remove.
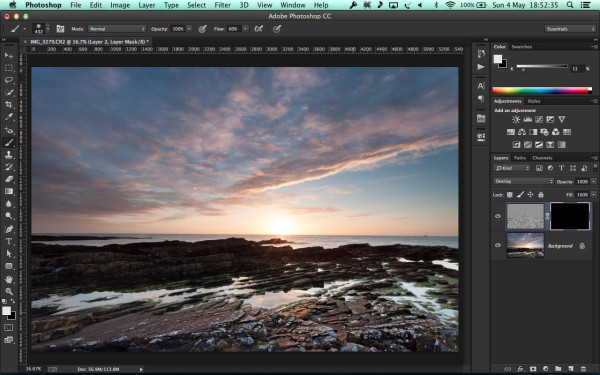
That’s all there is to it. Don’t over do it though!