My basic Lightroom 5 workflow
Posted: August 3rd, 2013 | Tags: Photography • Tutorials | Posted in: Photography, TutorialsWhen it comes to editing photos, I like to take as little time as possible, and I prefer an image that looks almost like it should SOOC (Straight Out of the Camera). Most of the shots I take only require a few minutes of editing unless I am trying to stylise them in a particular way. Images that require a lot of editing generally go in the trash.
Here are the core few steps I go through with every landscape/seascape image I take.
1. Lens Correction
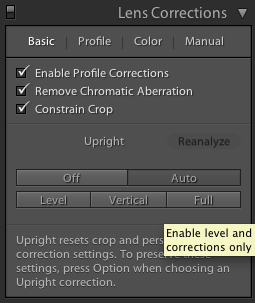
Lenses, even the expensive ones, are not perfect. They suffer from distortion, chromatic aberration and vignettes to varying degrees. Thankfully, Lightroom has lens profiles built-in to allow automatic correction of these problems. This is my first port of call when editing an image.
2. Horizontal/Vertical Straightening
I normally use a twin-axis spirit level for the majority of photographs I take, but sometimes I don’t have time, or I forget to take it with me. Lightroom 5 introduced an intelligent way to straighten things up. “Upright” automatically straightens horizontal or vertical lines by rotating and warping your images. It doesn’t work perfectly 100% of the time… just 99%.
Squint horizons really are one of the primary faux pas in photography, so this step is hugely important!
3. Dust/Spot Removal

No matter how hard you try, you will always end up with dust on your sensor, no matter how careful you are, dust is just an unfortunate fact of life for anyone using a DSLR. You only really see it in images captured at narrower apertures… but it always looks bad!
Here’s what I do to remove dust spots:
- I open up the first image in the set and use the Spot Removal Tool to remove the dust spots. Lightroom 5 has a new feature called “Visualize Spots”. I see this as being an essential feature when trying to find sensor dust in my images. I have to applaud Adobe for adding it to Lightroom 5.
- I then select the other images in the set by control-clicking them.
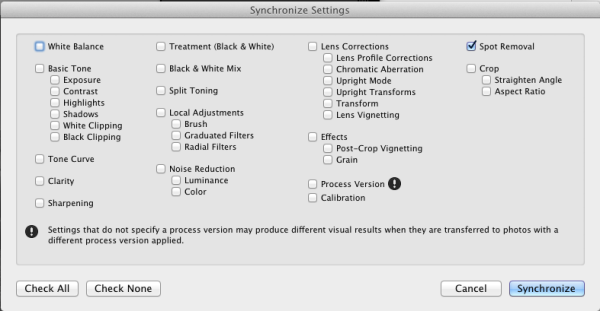
- Hit the Sync Button and choose “Spot Removal” from the Synchronize Settings.

Sync Options - Done! All the photos from your set have the spots removed from them.
4. White balance
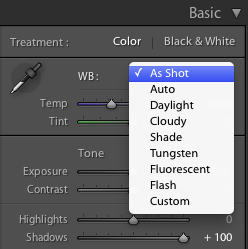
This is something that is particularly important for me when I take long exposure images. My B+W 10 stop filter creates a very warm cast in my images. Thankfully RAW makes fixing this a very simple process. I often use a X-Rite ColorChecker Passport, which allows me to create custom camera profiles for exact colour accuracy. The ColorChecker Passport is expensive, but brilliant! It also has a grey card attached for WB correction.
There are also cheaper alternatives for white balance correction. The Opteka Premium Reference Color & White Balance Grey Card Set is great value for money!
5. Balance Exposure
When taking landscape images It’s generally important to have roughly even exposure between the foreground and the sky. This is normally achieved using graduated neutral density filters. I normally use a Hitech 85 ND Grad Filter, and it works perfectly for me most of the time, but when it doesn’t I use Lightroom’s Graduated Filter. Sometimes I use the graduated filter to add clarity to the sky or foreground, or with long exposure shots I’ll use it to reduce clarity and sharpness.
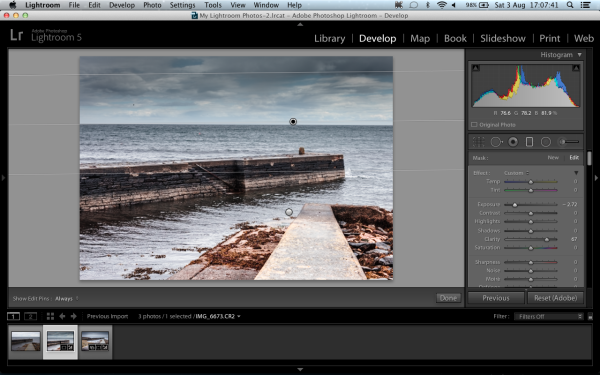
And that’s it! After this I normally play around with Split Toning or whatever until I end up with the look that best suits the image.
